Need help with anything in this article or have other questions? Contact us at support@noticiasolutions.com
Note: Only Case Administrators can run import jobs.
Video: How to Import
How to Import Documents
**Note: only Case Administrators can run import jobs
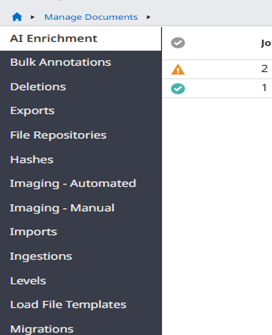
From the Documents page, select the Documents drop down, and then Manage Documents

Select Import Documents
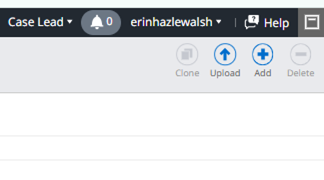
Select Upload Documents
Browse to your zip folder
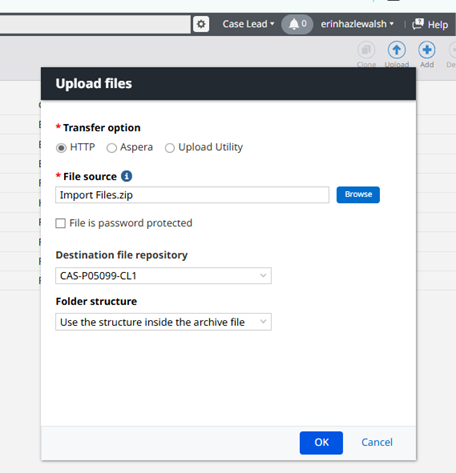
**Make sure your settings match the image
Do not close the pop-up that appears or your upload will be terminated

Once it has finished uploading and processing select Add

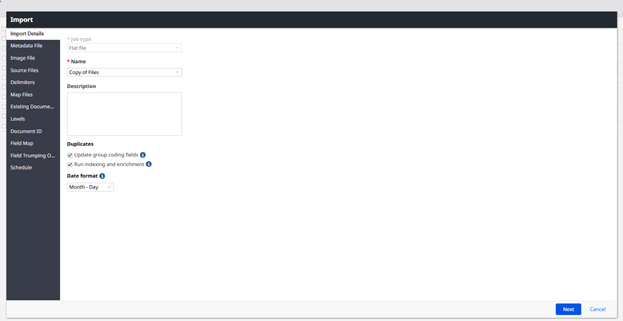
Change Drop down to Flat File, name your import, check group coding update, confirm your date format matches what’s in your load file, leave run indexing and enrichment unchecked

Select your folder containing the load file, and then select the load file you wish to use. Note the load file should be in the folder above the records

Select Import Image File if using an lfp or opt. Make sure to also select the file, and that it is also in the same folder as the data load file
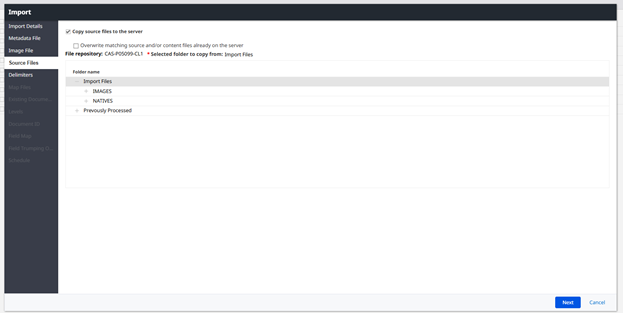
Check Copy source files to the servers, and confirm the folder containing the load file has been selected
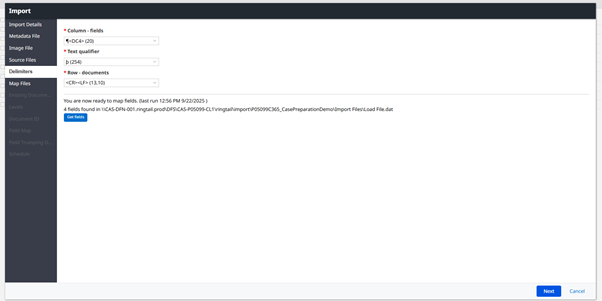
Select the Delimiters for your load file. The most common are:
CSV | Column: , (44) |
dat | Column: ¶<DC4> (20) |
**The Row-Document delimiters should never change.
Click Get Fields **
**If you get the error "Inventory job failed" it means you have extra columns in your load file. This usually happens when manually making an Excel. Open your load file in a text reader (notepad++ is our recommendation). Confirm there are extra fields, open the document in Excel, remove the empty columns, save, reupload the load file and start over
**If you only get one field, open the load file in a text reader (notepad++ is our recommendation) and confirm that the delimiters you chose match what you see in your load file. Correct your delimiter choices if they don't
Select the Native Path drop down and choose the filed that contains the relative path to the documents

Select appropriate option for loading text files. As a note, Discover has a powerful OCR engine and can extract text from native files even on import. It is advised to skip loading text files.
Import Action confirm Abort import, if it contains an existing document ID is selected

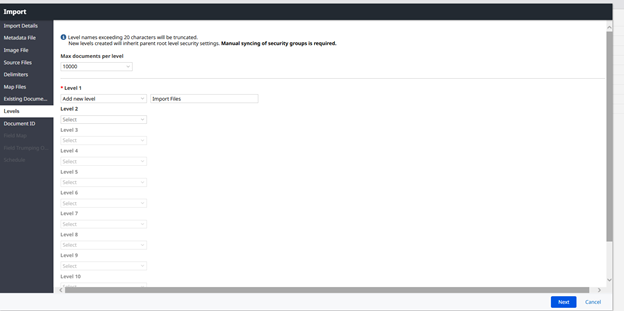
Structure the levels to match current setup, creating a new level is isolate the material being imported. Levels have a maximum of 10,000 documents per level
Select existing document ID and the field that contains the document id in your load file

For field mapping, select the system field or create a new field for each data option to be brought in. Document ID and source and attachments can be ignored, as they were previously mapped. For multi-entry fields confirm that the delimiter that you have selected in the database match the delimiter used in the field in the load file.

If more then one field is mapped to a system field, it will need to be decided the ranking that should be applied for importing material from the load file. If all fields from the load file are mapped to different fields in the system the page will be blank.

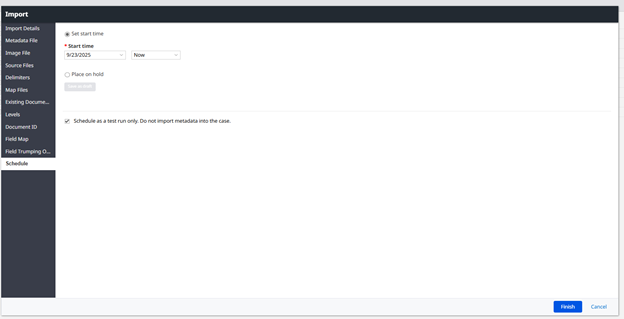
The scheduling page is the last option on the import. You are able to save as a draft, which is helpful if you need to make a change to something, or get clarification before proceeding, but do not want to have to redo all of the field mapping. You are also able to schedule the import to run at a later time. This is useful if you are trying to import a large amount of documents and want it done outside of regular hours. The final option is to run it as a test run. This will allow you to identify issues with the load file or the documents before you run the import. It is strongly advised that all imports have a test run first.
To check the status of the import the refresh icon can be found at the bottom of the page

Once the test has been completed, review the import job for any errors or warnings. A helpful guide can be found Here: Import Errors FAQ
select the clone option to create another import entry with all of the same settings and mappings

With this copy make sure to check the indexing box, to have the process run automatically after the ingestion
Click through all of the pages, and confirm the settings are what you are expecting/wanting. Once you reach the schedule confirm that test run is not checked this time, and submit the import job

With the test being run first the job should finish with a checkmark. Simply select the document count hyperlink to be taken to the document set.


Was this article helpful?
That’s Great!
Thank you for your feedback
Sorry! We couldn't be helpful
Thank you for your feedback
Feedback sent
We appreciate your effort and will try to fix the article